
AWS has released a new AWS SSO application in the Azure AD application gallery to make this configuration even easier!
AWS has also worked with Microsoft to update the existing Azure AD gallery application names and descriptions to help people understand the difference between the use cases.
You have 3 different options to connect your Azure AD to AWS:
- Use the AWS Single Sign-On Azure AD gallery application for multi-account access and single sign-on to the AWS Console, AWS Command Line Interface, and AWS SSO integrated applications.
- Use the previous Azure AD gallery application, now named AWS Single-Account Access.
- Use the AWS Console Access app for password vault sign-in to the AWS Console in a single account.
In this blog-post, I will go through option number 1 and follow you through the process step-by-step.
Organizations usually like to maintain a single identity across their range of applications and AWS cloud environments. Azure Active Directory (AD) is a common authentication method as Office 365 often is used among companies, and might be the hub of authentication as it often is integrated with other applications as well.
If you are using AWS Single Sign-On (SSO) you can leverage your existing identity infrastructure while enabling your users to access their AWS accounts and resources at one place. By connecting Azure AD with AWS SSO you can sign in to multiple AWS accounts and applications using your Azure AD identity with the possibility to enable automatic synchronization of Azure AD Users/Groups into AWS SSO.
This makes perfect sense and often improves your ability to further automate how you handle user-lifecycle and access to your AWS accounts as you might already have some identity manager connected to your HR system like Microsoft Identity Manager or Omada in place for example. You can also leverage your existing process for applying for access to different systems, ServiceNow or similar solution might already be connected to Azure AD in one way or another which then could be leveraged for applying for access to different AWS Accounts.
There are also other benefits such as levering your existing MFA solution if your organization has such a solution in place.
To the good stuff! I will in this blog-post demonstrate how you can connect your Azure AD to AWS SSO and take advantage of its capabilities.
Creating a new Azure Enterprise Application
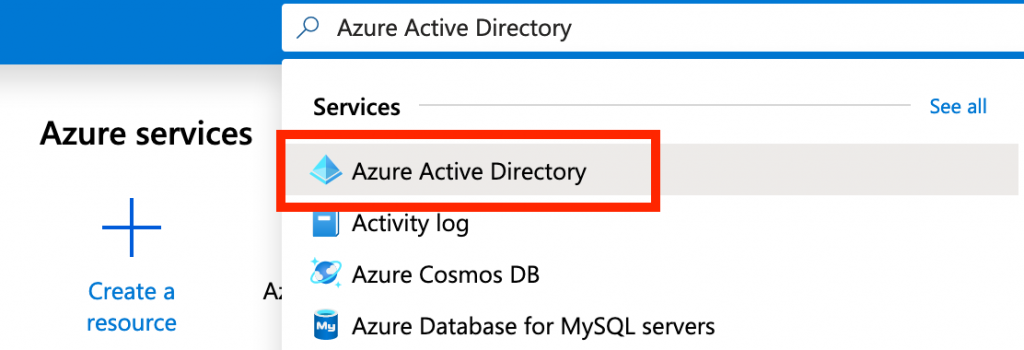
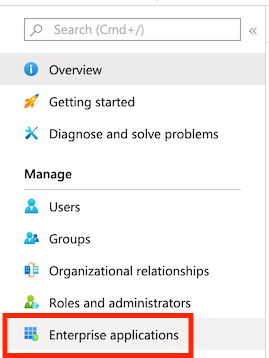
Login to your Azure portal and open Azure Active Directory. Under the Manage section, click on Enterprise application.
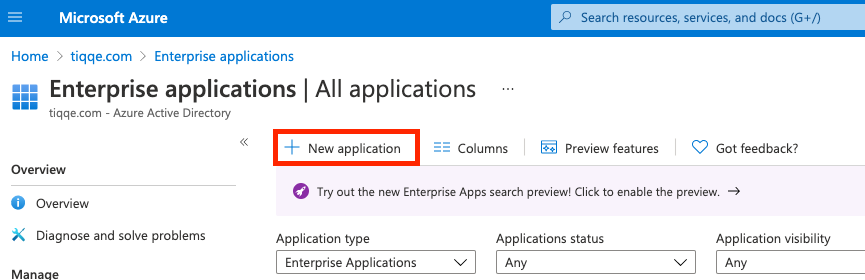
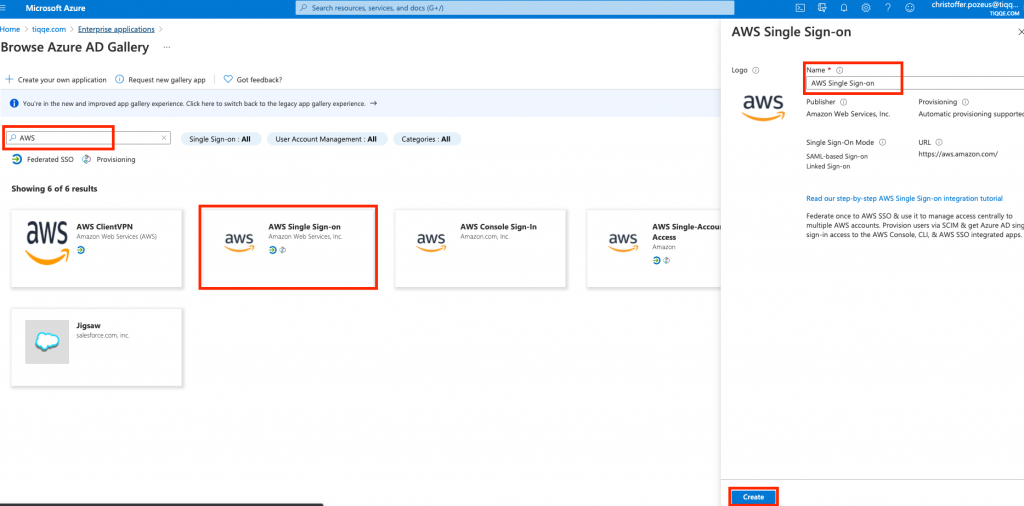
Click New application and search for “AWS” select AWS Single Sign-on, give your new application an appropriate name and click Create.
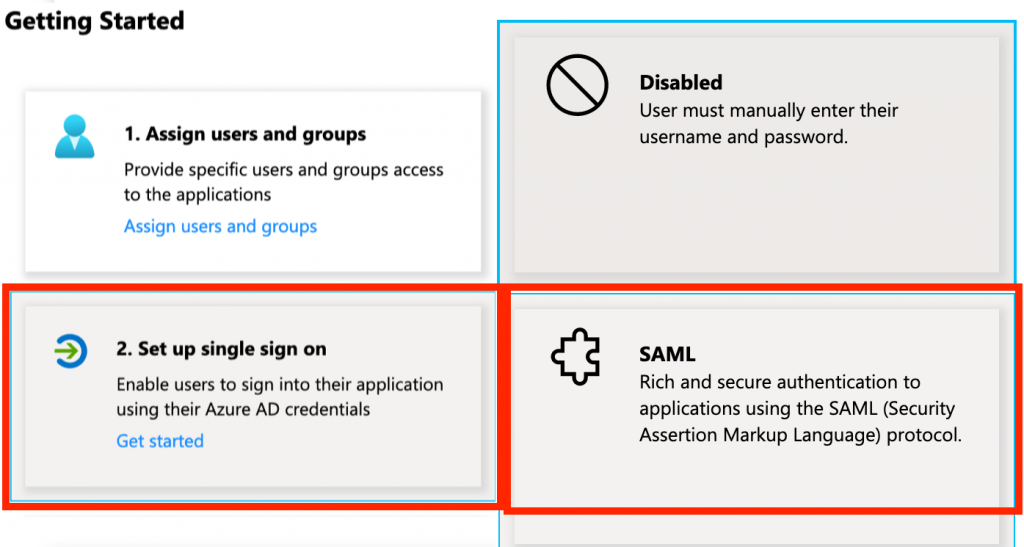
Once the Azure gods have created our new application, head into the Overview page and select Set up single sign-on and choose the SAML option.
Under section, SAML Signing Certificate click Download next to Federation Metadata XML.
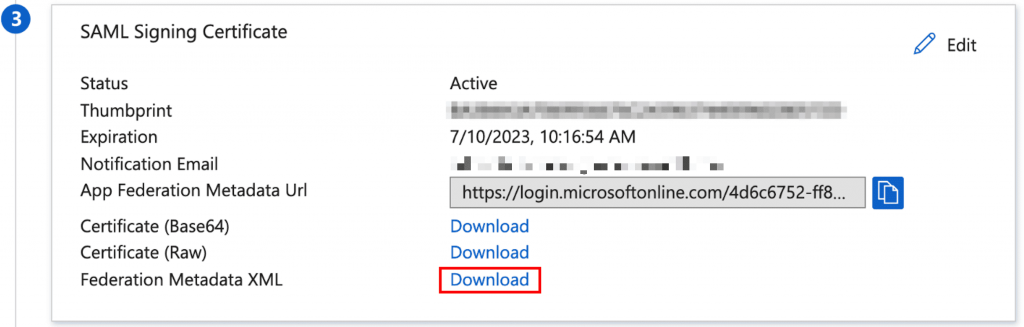
Please keep this page open as we later need to upload the metadata XML file from AWS SSO.
Setup AWS SSO
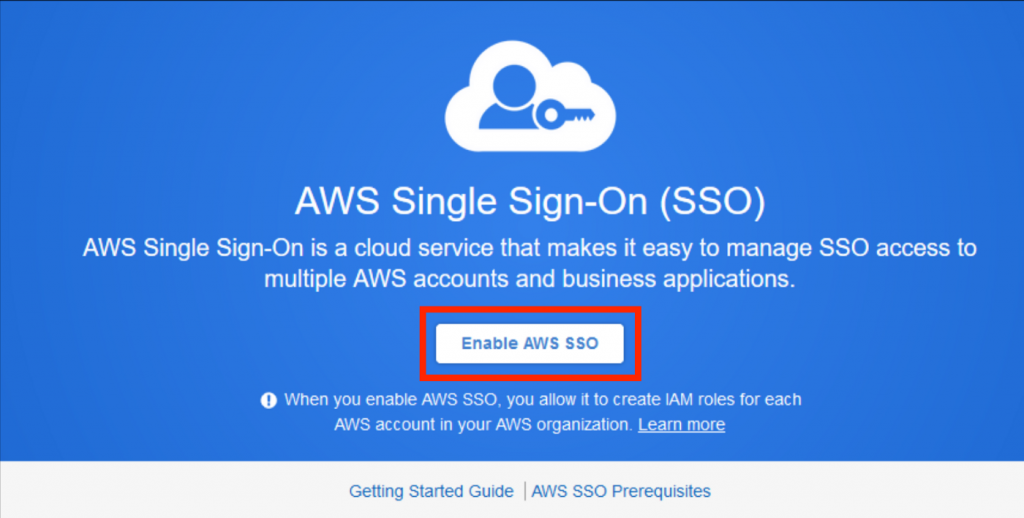
Login to AWS management console and open AWS Single Sign-On, please ensure that you are in your preferred region. If you haven’t enabled AWS Single Sign-On already, you can enable it by clicking Enable AWS SSO as shown below.
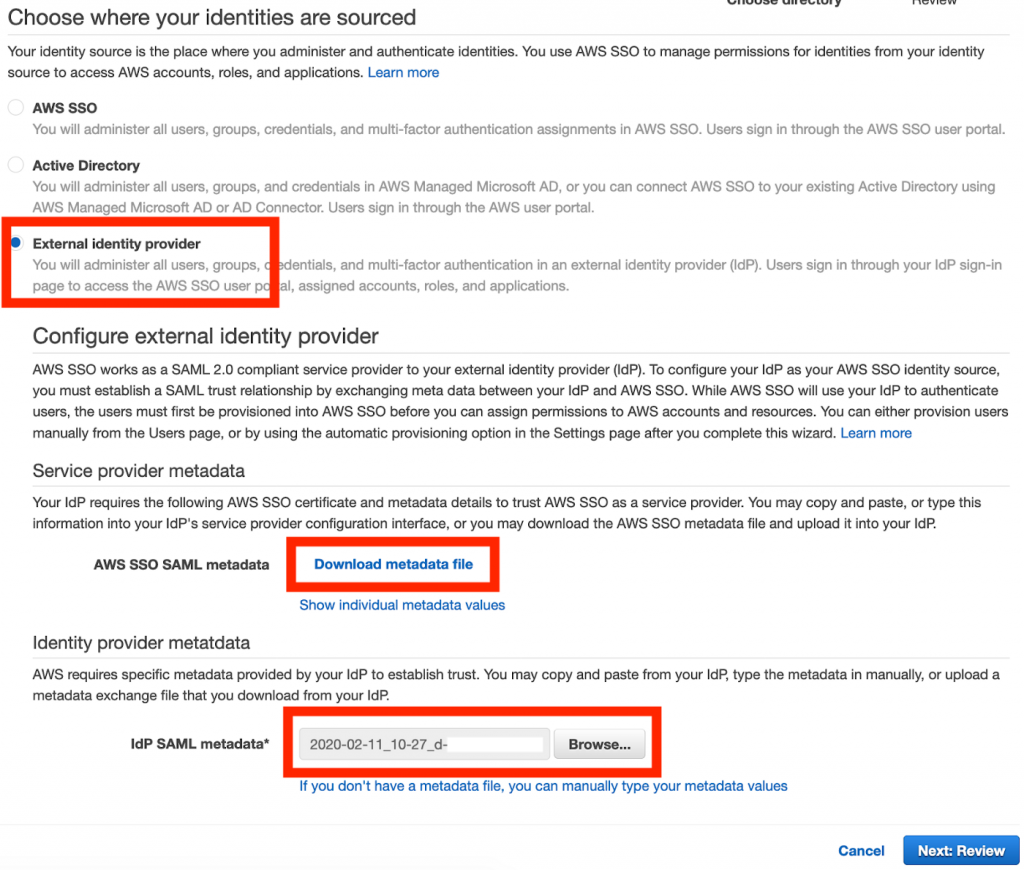
Click Choose your identity source. You can also configure your custom User portal URL if you’d like but it is not required.

Select External identity provider. Upload the AD Federation Metadata XML file downloaded earlier inside the IdP SAML metadata section and download the AWS SAML metadata file.
In the Azure SAML page, click Upload metadata file and upload the AWS SSO SAML metadata file.
If you have configured a User portal URL earlier, you need to edit the Basic SAML Configuration section and match the Sign-on URL.
Setting up automatic provisioning
The connection between Azure AD and AWS SSO is now established, we can proceed to enable automatic provisioning to synchronise users/groups from Azure AD to AWS SSO.
Note that you can use Azure AD groups but not nested groups ie. groups that are into groups.
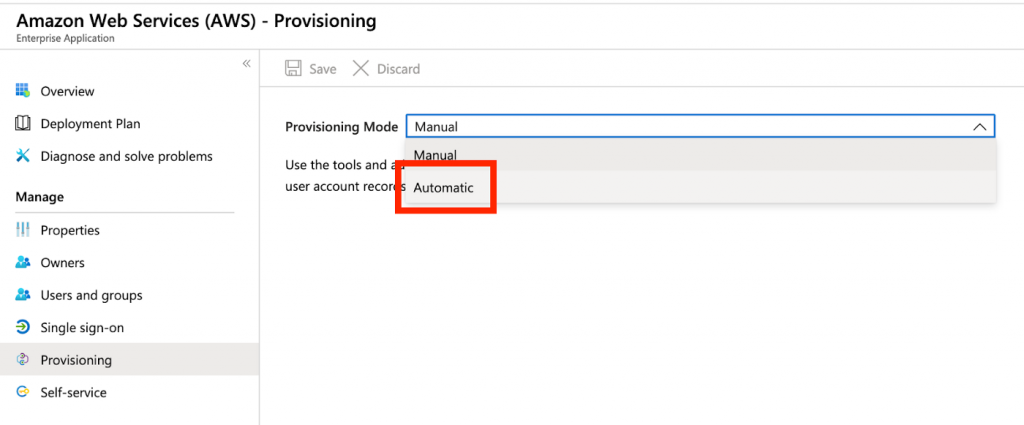
Head over to the Provisioning page and change the mode to Automatic. Please keep this page open as we will copy values from AWS SSO.
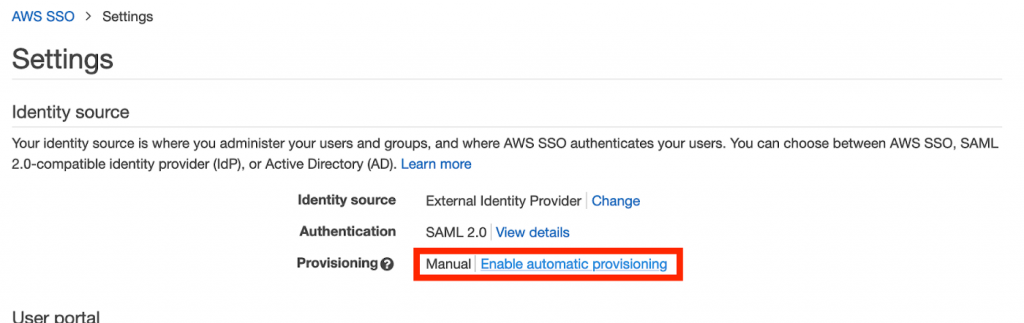
In the AWS SSO Settings page, click Enable automatic provisioning
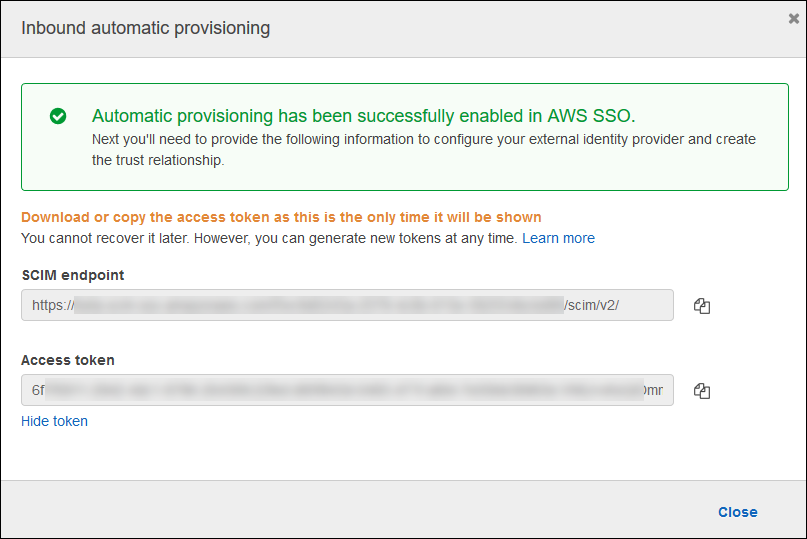
Take note of both values given in the popup
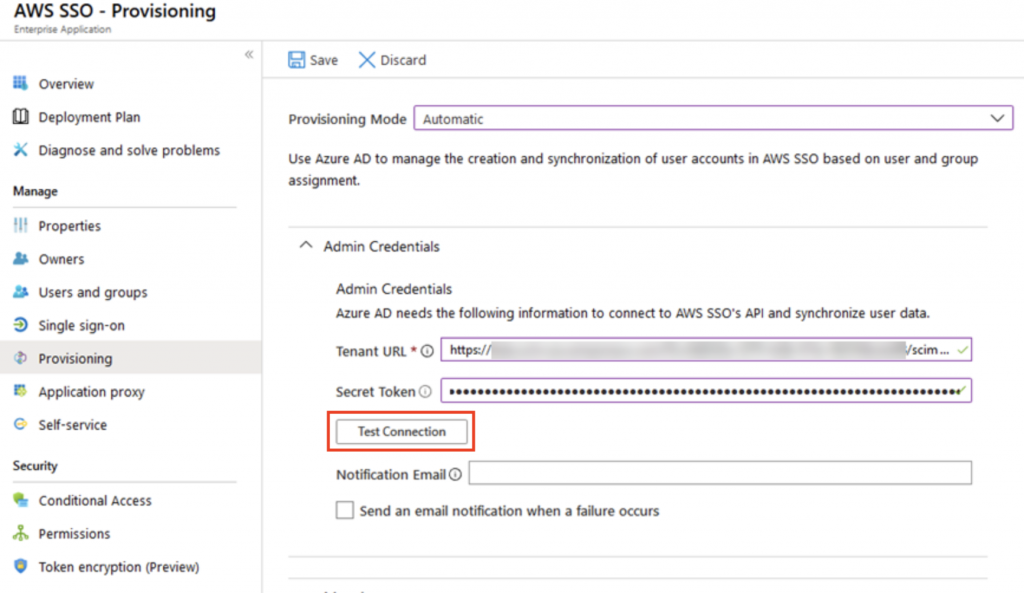
In the Provisioning page in the Azure portal, expand the Admin Credentials section and insert the values from above. It is also recommended to add an email address for notification of failures.
SCIM endpoint > Tenant URL
Access token > Secret Token
Note that these tokens expire after 1 year and should be renewed for continuous connectivity.
Click Test Connection and it should result in a success message.
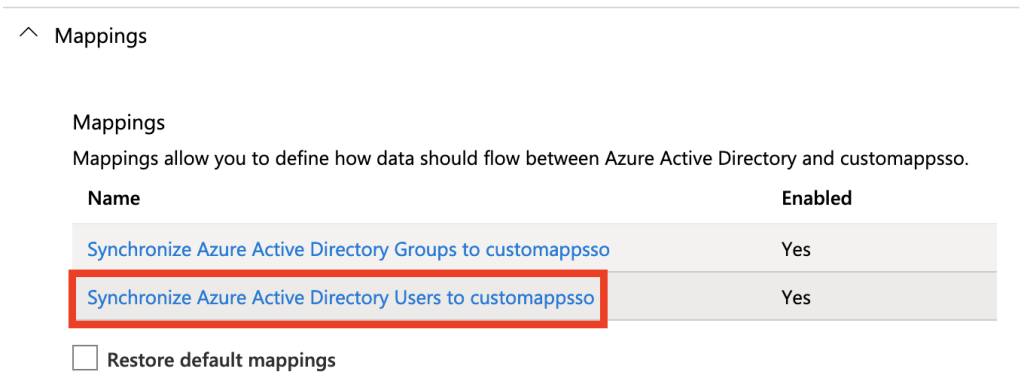
Expand the Mapping section and click Synchronize Azure Active Directory Users to customappsso
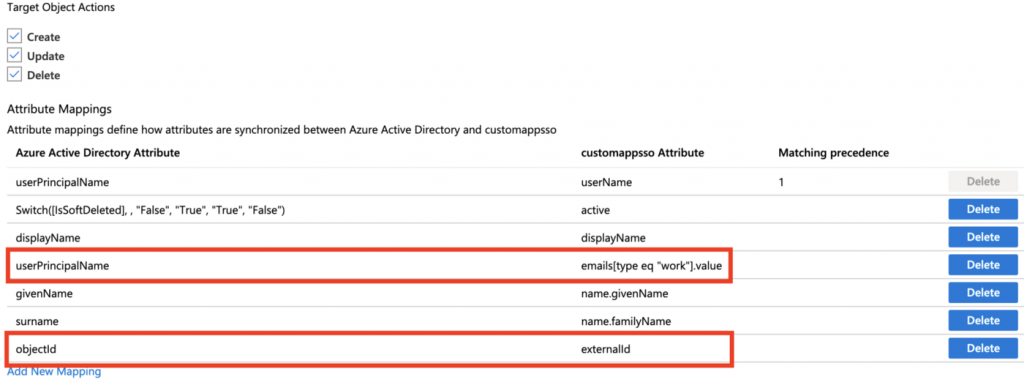
Which attributes you want to sync over depends on your setup, but default setups you can remove all attributes except:
userName
active
displayName
emails
name.givenName
name.familyName
You then create a new attribute mapping objectId with externalId.
Important to note is that you can modify the email attribute to use userPrincipalName over mail as not all users have Office365 licenses which leave that attribute null.
In the Provisioning page, you can now set the Status to On. It is recommended leaving Scope set to Sync only assigned users and groups.
Click Save, it should take about 5 minutes for it to start synchronizing.
Our AWS SSO and Azure AD connection is now fully set up, when you assign Azure Users/Groups to the enterprise app, they will then appear in AWS SSO Users/Groups within around 40 minutes.
Creation and assignments of AWS SSO Permission Sets
Using Permission Sets, we can assign permissions to synchronized Groups and Users, these permission sets will later create IAM roles in accounts which they are assigned.
You can create new Permission Sets based on AWS Identity and Access Management (IAM) managed policies or create your own custom policies.
To create a new Permission Set in the AWS Management console you can follow the below steps:
- Go to the AWS SSO management portal, in the navigation pane, choose AWS accounts and then the AWS organization tab.
- In AWS account, choose the account that you want to create a permission set for, and then choose Assign users.
- In Display name, choose the user name that you want to create the permission set for, and then choose Next: Permission sets.
- In Select permission sets, choose Create new permission set.
- In Create new permission set, choose Use an existing job function policy or Create a custom permission set depending on your needs, click Next Details, and then select a job function or create a custom policy or managed policy.
- You can then complete the guide and click Create.
You should then see the message “We have successfully configured your AWS account. Your users can access this AWS account with the permissions you assigned”.
If you are more comfortable with the AWS CLI you can use create-permission-set and create-account-assignment in the same way if you would like to.
The most preferred way is however to use Infrastructure as Code and keep this in version control to manage and deploy this.
If you want to use CloudFormation you can use the below template as a base to get started.
https://github.com/pozeus/aws-sso-management/blob/main/template.yml
But be careful on how you deploy these AWS SSO Permission Sets and assignments since it needs to be executed in the Master account. You should always follow the least privilege principle and should therefore carefully plan on which approach you use to deploy these Permission Sets and assignments.
If you want to automate assignments and creation of Permission Sets further, I suggest you go with an event-based approach and assign Permission Sets using Lambdas.
Summary
In this blog-post I showed how you can connect Azure AD to AWS Single Sign-On (SSO), you can now manage access to AWS accounts and applications centrally for single sign-on, and make use of automatic provisioning to reduce complexity when managing and using identities.
Azure AD can now act as a single source of truth for managing users, and users no longer need to manage additional identities and passwords to access their AWS accounts and applications.
Sign in is accomplished using the familiar Azure AD experience, and users will be able to choose the accounts and roles to assume in the AWS SSO portal.
You now also have the possibility to use your existing automation process on how you apply for access, grant and revoke access to systems.
If you have any questions or just want to get in contact with me or any of my colleagues, I’m reachable on any of the following channels.
Email: christoffer.pozeus@tiqqe.com
LinkedIn: Christoffer Pozeus